What Are the Best COB LED Strip Lights in 2026?
Choosing the best COB LED strip lights in 2026 is about more than brightness claims. A COB LED strip light places chips close together, creating a more continuous-looking line of illumination. That can make a visible difference beneath kitchen cabinets, along display shelves, or behind a desk. Fewer distracting light points. Still, a smooth glow does not guarantee a good fit for every room or project.
This guide compares practical features that shape everyday use: color temperature, color rendering, dimming compatibility, strip length, power requirements, and protective rating. These details help distinguish a suitable product from one that simply looks appealing in a listing. Installation matters, too. Measure the route, check connector and power-supply compatibility, and consider whether the strip needs a suitable channel or diffuser. Small details count. A high-output strip may feel harsh in a quiet bedroom, while a lower-output option may disappoint over a work surface. Product specifications can also vary by model and seller, so verify the current details before buying. Even careful comparisons have limits; room surfaces, installation quality, and personal preferences affect the result. The recommendations ahead focus on matching features to real use, rather than treating one strip as the universal winner. Expect trade-offs, and choose for the space you actually have.
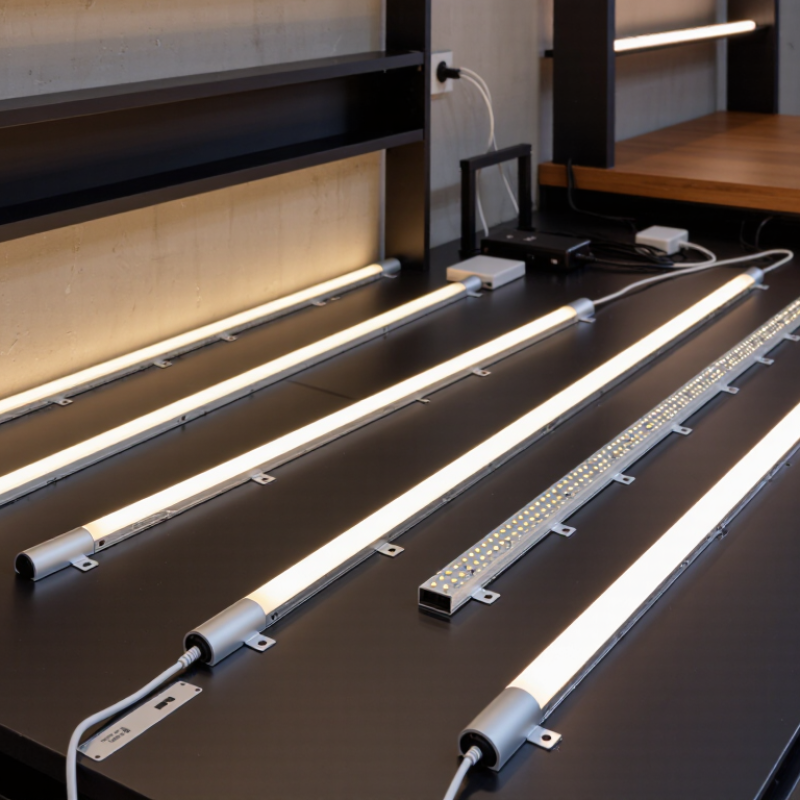
How COB LED Strip Lights Work and What Makes Them Different
COB means chip-on-board: many tiny LED chips sit closely together on a flexible circuit board. A phosphor layer covers them, blending their light into a nearly continuous line. Traditional strip lights often show separate bright points, especially through clear covers. COB strips look smoother.
That difference matters in shallow shelves, display cabinets, and under-cabinet lighting. You see fewer dotted reflections on glossy counters. The light can also appear more even across a nearby wall. “Dotless” is a useful description, but not a guarantee; lens shape, mounting distance, and surface finish still affect the result. Small details matter.
COB strips still need a suitable power supply and careful heat management. Check the strip’s voltage, wattage per metre, colour temperature, and colour-rendering rating before choosing one. A high rating can help food, wood, and fabric look more natural, though it does not fix poor colour balance. Measure the full run, too. Long installations may show brightness loss near the far end, depending on the strip and wiring. Cut only at marked points, and use an appropriate channel when you need added protection or a cleaner finish.
Key Features to Compare in COB LED Strip Lights
What Are the Best COB LED Strip Lights in 2026?
Key Features to Compare in COB LED Strip Lights
A useful comparison starts with light quality, not just brightness. Check the color rendering index (CRI); a rating of 90 or higher can make food, wood, and fabric look more natural. Compare color temperature too. Warm white suits bedrooms, while neutral white often works better over kitchen counters. COB strips create a smoother line of light than many spaced-LED designs, but the result still depends on the diffuser and installation.
Look at LED density, power requirements, and dimming compatibility. Higher density can reduce visible dark spots, though it may use more power. Long runs can lose brightness toward the far end, especially with lower-voltage setups. Check the recommended maximum run length and power supply before buying. Also inspect cut marks and connector options; a strip that cannot be cut where your layout needs it is frustrating. IP ratings matter near moisture, but an outdoor rating does not automatically make every connection waterproof. Small detail, big difference.
Tips: Test a short section before fixing the full strip in place. Clean and dry the surface, then press the adhesive firmly. If it feels warm or begins to peel, reconsider the mounting surface or add suitable clips. One thing is easy to overlook: a bright strip can still feel harsh without a diffuser.
Best COB LED Strip Light Options in 2026 by Use Case
What Are the Best COB LED Strip Lights in 2026?
Best COB LED Strip Light Options in 2026 by Use Case
The best COB strip depends on where it will sit and how you use the light. For kitchen counters, choose a high-density strip with even brightness and a diffuser channel to soften reflections on glossy surfaces. For shelves or display cabinets, a dimmable, lower-output option can highlight objects without washing out their colors. Check the color temperature before buying: warm white feels relaxed, while neutral white often suits task areas. Small detail, big difference.
Tips: Measure each run before ordering. Check the strip’s cut marks, power requirements, and compatibility with your dimmer. For bathrooms or covered outdoor areas, verify the stated moisture rating and install it away from direct water exposure. Heat matters, too; an aluminum channel can help dissipate it and protect the strip.
For accent lighting behind a desk or television, flexible strips are convenient, but leave room for bends and connectors. A sharp fold may damage the circuit. Longer runs can show brightness loss near the far end, so confirm the recommended maximum length and power-feed method. I’ve found that a quick test on the intended surface can prevent a disappointing color mismatch. Still, lighting is personal; samples are worth considering when the finish matters.
How to Choose Brightness, Color Temperature, Voltage, and Length
A COB LED strip can look evenly lit, but its brightness still needs to suit the task. For soft shelf or cabinet lighting, around 400–600 lumens per meter may be enough; work surfaces often need more. Compare the stated lumens per meter, not just watts. Check whether the strip will sit behind a diffuser, since that can soften the light. Small detail, big difference.
Color temperature shapes the room’s feel. Around 2700–3000K gives a warm, relaxed glow, while 4000K looks cleaner for kitchens or work areas. If accurate colors matter, check the CRI rating too. Voltage affects practical run length: 24V strips usually show less voltage drop over longer runs than comparable 12V strips. Still, follow the strip’s stated maximum length and power-supply requirements.
Measure the full route, including corners and the path to the power supply. Add a little allowance, but avoid buying far more strip than the project needs. Cut only at marked points, and check those intervals before ordering. I sometimes forget to account for a connector’s space; it is a small oversight that can force an awkward bend. A paper sketch helps.
Installation, Safety, and Maintenance Considerations
COB LED strip lights create a smooth line of light, but careful installation helps preserve that even glow. Before mounting, measure the run and locate the strip’s marked cut points. Match the strip’s voltage to its power supply, and allow extra capacity rather than running the supply at its limit. Use an aluminum channel to help manage heat and protect the LEDs. Disconnect power before wiring. Never force a tight bend; it can damage the strip or weaken a connection.
Tips: Clean and dry the mounting surface first. Test the strip before fixing it in place. Check polarity at every connection. For damp locations, choose components rated for that environment, and seal connections as directed by their instructions.
During maintenance, switch off power before inspecting the strip, connectors, or power supply. Look for lifted adhesive, discoloration, loose wires, or flickering. These can point to heat buildup or a poor connection. Remove dust with a dry, soft cloth; avoid soaking the strip. If a section stops lighting, inspect the nearest connector and cut point before replacing the whole run. One detail is easy to underestimate: a tidy installation can still run hot inside a closed space, so leave room for airflow.