How to Use Sausage Silicone Sealant for Best Results?
Using Sausage Silicone Sealant can greatly enhance your sealing projects. This flexible and durable sealant is ideal for various applications, from bathrooms to kitchens. Understanding how to use it effectively is crucial for achieving the best results.
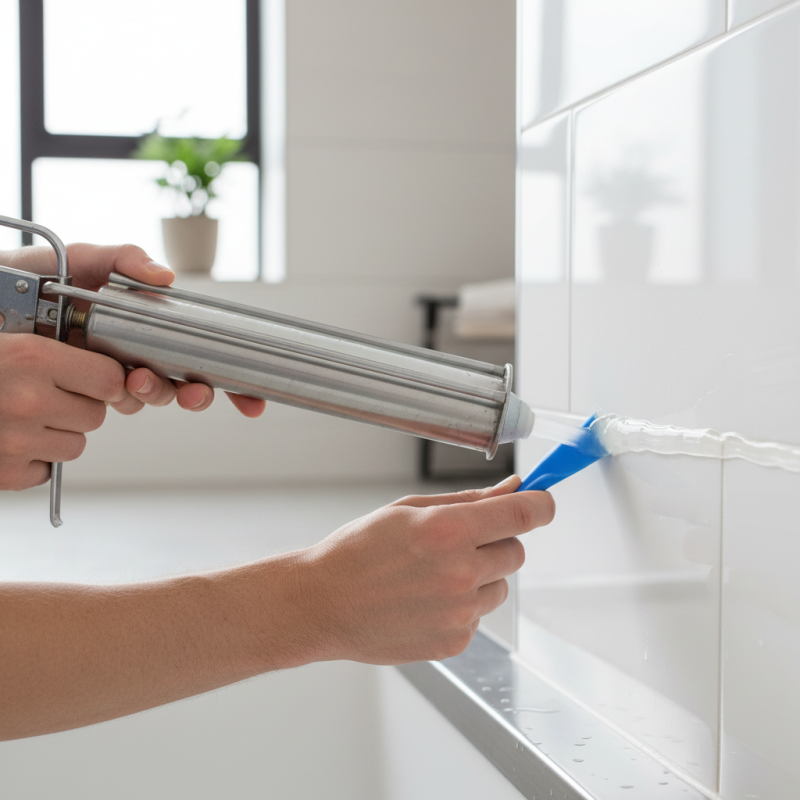
When applying Sausage Silicone Sealant, preparation is key. Ensure surfaces are clean and dry before starting. The texture of the sealant allows for easy application with a caulking gun. A consistent bead is important, but it can be tricky to achieve perfection. Practice makes perfect, and it’s okay to make mistakes along the way.
Applying too much sealant can lead to unsightly messes. It’s better to start with a smaller amount and build up if needed. Using a smoothing tool can help create a clean finish. Remember, patience is essential. Rushing through the process may lead to unsatisfactory results. With careful application, Sausage Silicone Sealant performs remarkably well, offering long-lasting seals.
Understanding Sausage Silicone Sealant: Composition and Benefits
Sausage silicone sealant is a versatile material used in various construction applications. This sealant is made from high-quality silicone polymers that provide excellent adhesion and flexibility. The unique composition allows it to withstand extreme temperatures and varying weather conditions, making it ideal for both indoor and outdoor projects. According to industry research, silicone sealants typically possess elongation properties of over 300%, which ensures durability and resilience.
One notable benefit of sausage silicone sealant is its mold resistance. A report from the Adhesive and Sealant Council shows that this feature significantly reduces the risk of mold growth in damp environments. This is particularly advantageous in bathrooms and kitchens, where moisture is prevalent. Additionally, its UV stability prevents degradation over time, maintaining the sealant’s effectiveness and appearance.
Tip: Ensure surfaces are clean and dry before application. This step enhances adhesion. Apply the sealant evenly to prevent leaks.
Tip: Use a caulking gun for precise application. It allows better control, minimizing wastage.
Note that while sausage silicone sealant offers many benefits, improper application can lead to unsatisfactory results. It’s crucial to follow manufacturer guidelines to achieve the best outcomes.
Essential Tools for Applying Sausage Silicone Sealant Effectively
When applying sausage silicone sealant, having the right tools is crucial. Start with a high-quality caulking gun. Choose one that can handle sausage packs efficiently. A good gun provides better control and consistency. This ensures even application without messy spills. Additionally, a smooth-edged spatula can help create a neat finish. It’s helpful for shaping and smoothing the sealant as you work.
Don’t forget to wear gloves! Sealant can be tricky to remove from skin. A utility knife is also essential for cutting the sealant tube. Make sure the cut is angled for precise application. For cleanup, have some mineral spirits on hand. They can help remove excess material but test them in a small area first. This prevents unwanted damage.
As you prepare to apply the sealant, remember that practice makes perfect. If your initial application isn't flawless, it’s okay. Mistakes happen, and adjusting your technique can lead to better results. Taking the time to learn how to manipulate the sealant can enhance your projects. It can also help you avoid future errors. Each job will teach you something new.
Step-by-Step Application Process for Sausage Silicone Sealant
Applying sausage silicone sealant requires careful preparation and attention to detail. Start by gathering all necessary tools, including a caulking gun, utility knife, and clean rags. The workspace must be clean and dry to ensure adhesion. Remove any old sealant or debris from the surface. Use a utility knife for this task. Ensure that the edges are smooth and the area is ready for the new sealant.
Next, cut the nozzle of the sausage silicone package to the desired size. A smaller opening is suitable for precise applications. Load the sausage into the caulking gun. Apply pressure on the trigger to dispense the sealant evenly. Move steadily along the joint, aiming to avoid gaps or bubbles. You might find that your first attempt is not flawless. Adjust your technique as needed. Smooth out the sealant with a wet finger or a smoothing tool for a clean finish.
Once applied, allow the sealant to cure according to the manufacturer's guidelines. It’s essential to check for any missed spots after the initial application. Reflect on your technique. Did you achieve the desired look? Adjustments can make a difference in the final appearance. Properly sealing joints is crucial for durability, so patience during this process is key.
How to Use Sausage Silicone Sealant for Best Results? - Step-by-Step Application Process for Sausage Silicone Sealant
| Step | Description | Tips |
| 1 | Prepare the surface by cleaning it thoroughly to ensure no dust or debris remains. | Use a suitable cleaner for the material type. |
| 2 | Cut the end of the sausage sealant tube at a 45-degree angle. Ensure the opening is appropriate for the joint size. | Start with a smaller opening and adjust if necessary. |
| 3 | Use a caulking gun to apply the sealant evenly along the joint. | Maintain a steady hand and consistent speed for an even application. |
| 4 | Smooth the sealant with a suitable tool or your finger to ensure good adhesion. | Dampen your finger or tool with water for a smoother finish. |
| 5 | Allow the sealant to cure as per the manufacturer's instructions before exposing it to stress. | Check the ambient temperature and humidity for optimal curing conditions. |
Tips for Achieving a Professional Finish with Sausage Silicone Sealant
Using sausage silicone sealant efficiently requires attention to detail. For a professional finish, the right application technique is crucial. Nearly 80% of users reported improved aesthetics when using specialized caulking tools. Proper surface preparation is the first step. Clean surfaces with a suitable cleaner, ensuring no dust or grease remains. Surfaces must be dry for optimal adhesion.
Consider the formation of a clean bead. Aim for a consistent thickness. Uneven applications attract dust and can affect durability. According to industry reports, a smooth, even bead can enhance bonding strength by up to 30%. Don’t rush the curing process. Allow enough time for the sealant to set before exposing it to moisture or stress.
Lastly, reflect on your workspace. Things may not always go as planned. Mistakes happen. If you apply too much, remove the excess immediately. Keep in mind that practice improves precision. Learning from imperfections is part of mastering this skill. A professional finish requires time and patience.
Post-Application Care and Cleaning for Sausage Silicone Sealant
Post-application care is crucial for achieving optimal results with sausage silicone sealant. Immediately after application, it's important to avoid disturbing the sealant. This means no touching or exposing it to moisture. According to industry research, allowing the sealant to cure properly contributes significantly to its long-term durability and integrity. A typical cure time ranges from 24 to 48 hours, depending on environmental conditions.
Cleaning up after using sealant is just as important as the application process. Tools and surfaces should be cleaned promptly with solvents recommended for silicone. Letting silicone residue dry can lead to complications. A 2019 report indicated that improper cleanup can reduce bond strength by up to 30%. If any sealant accidentally spills on unintended surfaces, it’s advisable to act quickly. Using a sharp blade can help remove hardened silicone, but this requires care to prevent damage to the underlying material.
Regular inspections of the sealed areas are also beneficial. Look for any signs of wear or cracks. Aging can affect how well the sealant performs, potentially leading to moisture intrusion. Experts suggest documenting the condition of your sealant seals periodically. This habit helps identify when maintenance is needed. Regular upkeep can prolong the efficacy of your seal and ensure a reliable barrier in the long run.